Crafting Danish Bedroom Furniture: A Client’s Journey
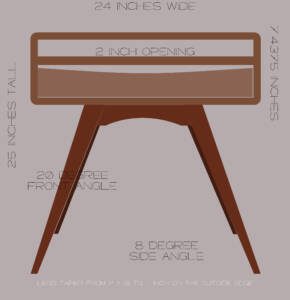
In this latest endeavor, we are crafting a Danish-inspired bedroom piece for a new client, whom we’ll call Barbara from New Jersey. Our discussions with Barbara were extensive as she was evaluating other furniture makers as well. Budget considerations led her to choose cherry wood over the pricier walnut or teak. Cherry fits the style beautifully and is much more affordable—almost half the cost of walnut and significantly cheaper than teak. These discussions exemplify our commitment to working closely with clients to ensure the final piece aligns perfectly with their vision, balancing aesthetic preferences with budgetary needs.
Sourcing the Perfect Cherry Wood
The journey began with finding the right material. Cherry wood, known for its fine grain and smooth finish, was her wood of choice. While fully figured cherry was beyond the project’s budget, we discovered a batch with a shimmering grain that provided a similar aesthetic without breaking the bank. Last Friday was spent meticulously selecting and preparing the wood, ensuring that each piece used would showcase the best patterns for the nightstand’s top.
The Preparation Process
Our preparation process is thorough and detailed. After cutting the wood to rough dimensions, we started with edge-jointing to establish a straight reference edge, crucial for ripping the pieces accurately. We then face-jointed one face to get it flat before sending the boards through the planer for parallel faces. The wood was stickered to promote air circulation and acclimatization, crucial for relieving internal stresses and preventing future warping or twisting.
Addressing Wood Stress
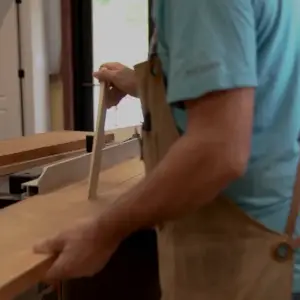
An interesting moment occurred during the ripping process—stress within the wood led us to insert a wedge in the saw kerf, highlighting the dynamic nature of working with natural materials. This step emphasizes why we allow the wood to rest post-cutting; it’s essential for ensuring stability in the final product.
We often receive questions about why custom furniture creation takes time. This careful handling of wood stress is a prime example. Although we use only kiln-dried hardwoods, each board contains inherent tensions that might not manifest until we start working with the material. To mitigate this, new wood is allowed to acclimate to our shop’s environment for one to two weeks before we begin the dressing process. After initial dressing, we sticker the wood again, letting it rest and stabilize further for another week or two. This meticulous process ensures any potential warping or cupping occurs before the wood is integrated into our projects, allowing us to make final adjustments to nearly finished dimensions.

Day 1: The Journey Begins
Today, we kicked off the creation of Barbara’s custom Danish bedroom furniture with an intensive day of wood milling and dressing. You can witness the transformation of raw cherry into dimensioned pieces ready for crafting in the timelapse video below. This initial phase is crucial for ensuring the wood’s quality and stability in the final piece.
Stay tuned! We’ll continue updating this blog with more behind-the-scenes looks as we progress in building this unique piece for Barbara.
Welp, the video is too large to host here, so I will have to edit it into chunks… But now its time to go grocery shopping.


