Dining Table for 10
A dining table for 10 for a couple in the heart of Idaho is set to become the centerpiece of their home, and we, as the commissioned artisans, embark on a remarkable journey to bring their vision to life. This blog invites you to witness the intricate process that unfolds behind the scenes, showcasing not only our craftsmanship but also the communication and logistical considerations that make every project a success. From the initial conversations, where ideas take shape and design choices are made, to the precise order of operations and the careful documentation of each stage, we ensure that our clients are part of the journey every step of the way. With open lines of communication and a collaborative approach, we translate their dreams into tangible designs. This is where the magic happens – as wood transforms into a work of art and the table takes shape. Join us as we peel back the layers of craftsmanship and commissioning a custom piece. And we unveil the dedication, precision, and passion that go into creating a bespoke walnut dining room table. Together, let’s delve into the process and celebrate the remarkable journey from raw materials to a stunning centerpiece that will grace our clients’ home in Idaho.
Intake: Transforming Visions into Reality
Through a series of emails and image exchanges, we embark on a collaborative journey to uncover the customer’s unique requirements and design preferences for the perfect dining table. In one email, we nailed down the dimensions, ensuring that the table comfortably seats 10, spans approximately 9 feet in length, and measures between 40 to 44 inches in width. Another email delves into the intricate details of the leg shape, where the customer expressed a desire for slightly tapered legs and the tabletop to have a simple square edge treatment. With each exchange, we refine the design, ensuring every aspect aligns with the customer’s vision and our commitment to exquisite craftsmanship. Together, we navigate the creative process, exchanging ideas, inspiration, and design choices, all leading to the realization of a truly bespoke dining table.

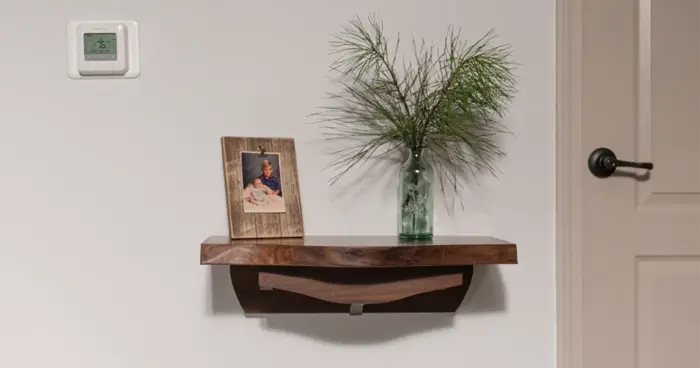
Inspiration Image
This was the image the client sent over to start the process.
The creative process began with an image shared by our client, serving as a source of inspiration and setting the tone for their desired dining table. The snapshot captured their aesthetic sensibilities, providing a starting point for our collaborative journey. However, we understood the importance of going beyond replication and creating a truly personalized piece. While the initial image featured a thinner tabletop, our client expressed their desire for a more substantial and even slightly chunky design. It was through careful communication and exploration that we transformed their inspiration into a bespoke masterpiece.
Every step of the way, we engaged in open and collaborative conversations, embracing their feedback and incorporating their unique style and character into the design. The result is a truly exceptional dining table for 10—a testament to the fusion of their inspiration and our craftsmanship. From the initial image to the final creation, we embarked on a journey that breathed life into their vision and produced a centerpiece that perfectly reflects their individuality.


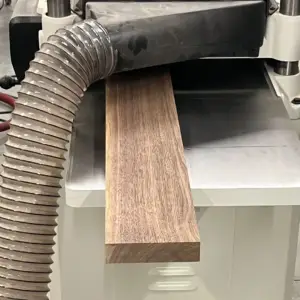
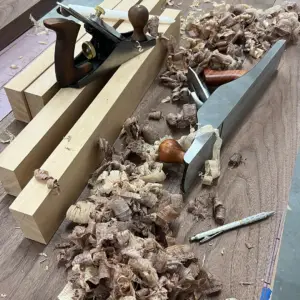

Table for 10: Crafting the Foundation of a Custom Dining Experience
Once the requirements were finalized, we proceeded to acquire the necessary materials for the project. We carefully selected high-quality 8/4 walnut, a stunning hardwood known for its rich, warm tones and distinct grain patterns. Before diving into the milling process, we allowed the wood to acclimate to its new surroundings in our workshop for about a week, ensuring its stability and minimizing any potential warping or movement.
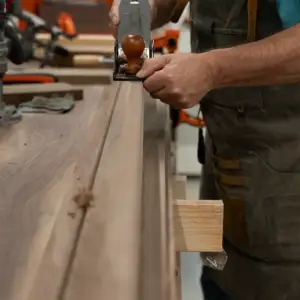
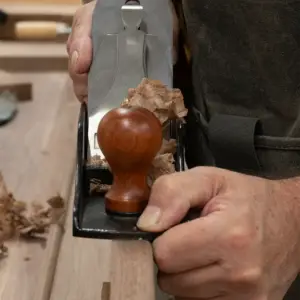
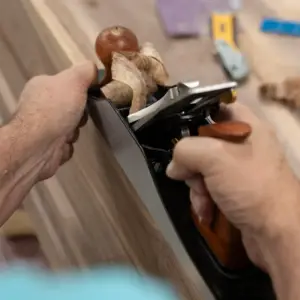
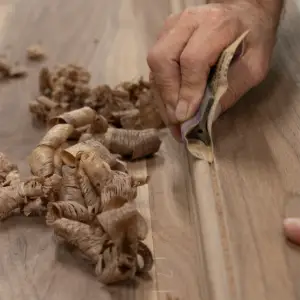
With the walnut ready, we embarked on the journey of transforming rough boards into the foundation of the dining table. Because these large and heavy boards required extra precision, we employed techniques to ensure flawless results. After using the jointer to establish straight edges, we took it a step further by hand planing each edge with a #6 fore plane. This meticulous, and some would say, old fashioned process ensured that every edge mated perfectly with its neighbor, creating a seamless and cohesive tabletop. Next, we proceeded to meticulously plane the boards, flattening and smoothing their surfaces to reveal the natural beauty hidden beneath the rough exterior.
Table for 10: A Visual Symphony of Walnut Grain
As the boards were prepared, we approached the next crucial step in the process—arranging them on a table. This was a moment of artistic consideration, where we carefully assessed the unique grain patterns and figuring of each piece. With precision and attention to detail, we arranged the boards in a visually pleasing manner, allowing the grains to flow harmoniously and create depth within the final table design. It was a captivating process, where the inherent beauty of the walnut took center stage, captivating the eye with its natural allure.
At this stage, we valued the input of our client. Their vision played a significant role in determining the final arrangement. We believed in the importance of collaboration, ensuring that their preferences and desires were honored. By incorporating their feedback, we ensured that the table design resonated with their personal aesthetic and became a true embodiment of their vision. After all, it is their satisfaction and joy that we strive to achieve throughout the entire crafting process.
To achieve the desired width of the table, we carefully ripped the larger pieces of walnut into roughly equal-width boards. This process allowed us to bring the overall dimensions of the table closer to our target, ensuring a balanced and proportionate final piece. Each board was selected and cut with precision, taking into account the specific requirements of the project and the desired aesthetic outcome.
Throughout these initial stages, we documented the progress with detailed images, capturing the transformation from raw lumber to beautifully prepared wood ready for the next phases of the build process. Stay tuned as we unveil the behind-the-scenes moments and delve further into the craftsmanship involved in bringing this walnut dining table to life.
The Walnut Tabletop: A Journey of Precision and Skill
The Tabletop
As we enter the ‘building’ stage of creating a dining table for 10, aptly named ‘The Weight’, our attention turns to the magnificent tabletop—a true masterpiece in the making. With every detail planned, we embark on the process to prepare the boards for the glue-up, ensuring a flawless and striking result.
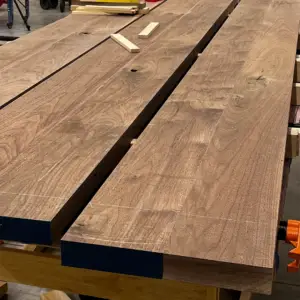
Given the size and weight of the boards, we encountered a unique challenge. To achieve perfectly straight and smooth edges, we turned to the art of hand jointing. With steady hands and unwavering focus, we carefully jointed the edges, eliminating any imperfections and guaranteeing seamless connections.
Arranging the boards became an art form in itself. We considered the captivating interplay of grain patterns, color variations, and figuring, seeking the most visually stunning arrangement. It was crucial to create a harmonious flow that would enhance the overall aesthetic impact of the tabletop.
Prior to the final glue-up, a meticulous dry fitting process took place. This critical step allowed us to ensure precise alignment, confirming that each board would seamlessly come together like pieces of a perfectly crafted puzzle. Adjustments were made until perfection was achieved.
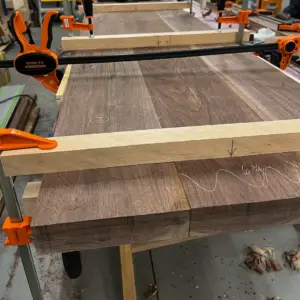
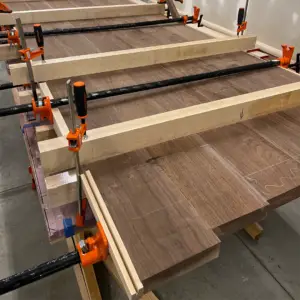
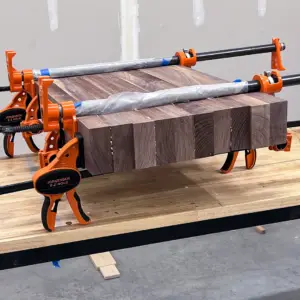
To ensure a flat and even tabletop, we crafted custom-made 50″ hard maple cauls. These precisely designed cauls were strategically positioned during the glue-up process, exerting gentle and uniform pressure, resulting in a flawlessly bonded tabletop that remained flat.
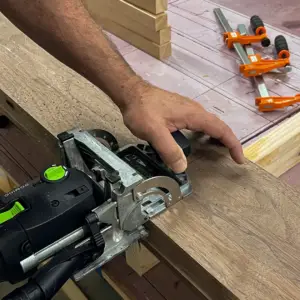
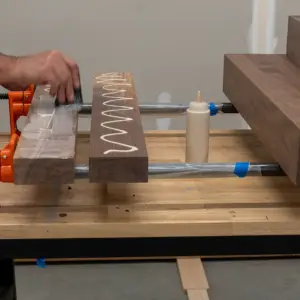
Finally, the time came for the grand glue-up. With focused determination, we applied high-quality Titebond III wood glue to the jointed edges, meticulously aligning each board. Taking advantage of the versatility of loose tenon joinery, we strategically glued subassemblies together. This involved combining two boards using dominoes, then adding two boards to another two boards, and finally joining four boards to the last two boards. These subassemblies are heavy so gluing up this way was just a little easier on the craftsman. Although we used all 6 boards when we clamped them together. This is to ensure that we have a flat top when all 6 boards are joined.
The glue-up of a table this size is no small feat, especially in a small shop like ours, requiring a delicate balance of precision, skill and a lot of muscle. We take pride in every step of this process, knowing that the end result will be nothing short of extraordinary. The tabletop is now one step closer to becoming the centerpiece that will grace our client’s dining space, radiating elegance, strength, and timeless beauty. (soooo much sanding left to do :))
The Tabletop
The Apron
The Aprons:
As we start to enter the final ‘build’ stage of creating ‘The Weight’, our attention turns from the tabletop—to the structure that will hold it together for years to come.
The aprons, an integral part of the table’s structural integrity, underwent a meticulous process to ensure their strength and visual appeal. After the selection of 5/4 stock and initial dressing of the pieces, we deliberately made them slightly larger than usual. This decision was driven by the understanding that ‘The Weight’ demands more substance and presence. The aprons netted out at 1″ thick.
With keen attention to detail, we hand planed and meticulously sanded each apron, achieving a flawlessly smooth surface that invites admiration. To elevate the aprons to another level of elegance, a 1/2″ bead was masterfully crafted along the bottom edge. This subtle yet striking detail adds a touch of refinement, highlighting the craftsmanship inherent in every aspect of this piece. These subtle differences should captivate the eye and lends an air of substance to the table, making it an exquisite focal point in any dining space.
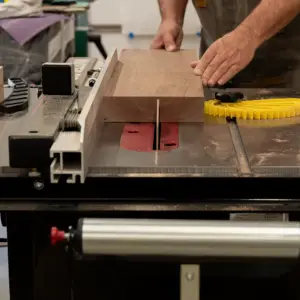
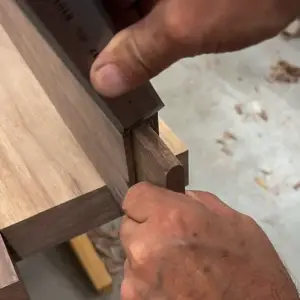
With the aprons expertly shaped and adorned, our attention now turns to the precise process of cutting the tenons. These tenons will play a crucial role in securely connecting the aprons to the massive walnut legs, ensuring the table’s stability and longevity. Every step in the journey of crafting ‘The Weight’ has been carefully planned and executed to create a masterpiece that will stand the test of time.
While the tabletop represents a significant milestone in the creation of ‘The Weight’, we recognize that there are still exciting chapters yet to unfold and a heck of a lot of planing and sanding to do on the top itself. Not to mention the refinement of the legs to the final finishing touches, each step brings us closer to the culmination of this grand creation.
Next we will move to cutting the mortise and tenons… so stay tuned.
Dining Table for 10: Crafting the Perfect Legs for the Table – Leg Day
On leg day, we focused our woodworking prowess on creating the perfect legs for this exquisite dining table for 10. Let’s take a closer look at the step-by-step process involved in crafting these magnificent leg components:
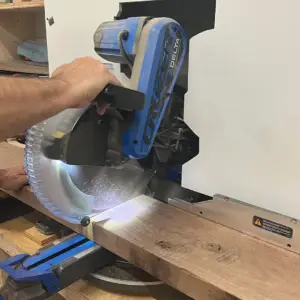
Cutting to rough length: We made precise cuts to determine the initial length of each leg, ensuring they are proportionate and harmonious with the overall table design.
Ripping to rough width: With finesse, we carefully ripped the walnut boards into widths that will form the substantial and sturdy leg pieces.
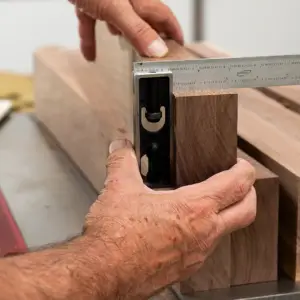
Jointing a face flat: Utilizing our trusted jointer, we meticulously flattened one face of each leg board, creating a smooth and level surface for enhanced stability.
Jointing an edge square and flat: With precision, we squared and flattened the edges of the leg boards, ensuring precise alignment and seamless connections.
Flattening the opposite sides with the planer: The planer worked its magic, effortlessly revealing the captivating grain patterns and natural beauty of the walnut as we flattened the opposite sides.
Gluing and clamping: With utmost care, we applied high-quality wood glue to join the leg components together, aligning the edges perfectly. The use of clamps provided the necessary pressure to ensure a strong and durable bond.
Leg day in the workshop is a labor of love, where craftsmanship and attention to detail merge. We pour our passion into every aspect of creating these exceptional legs, ensuring that they embody the essence of what the client envisions for their dining table for 10.


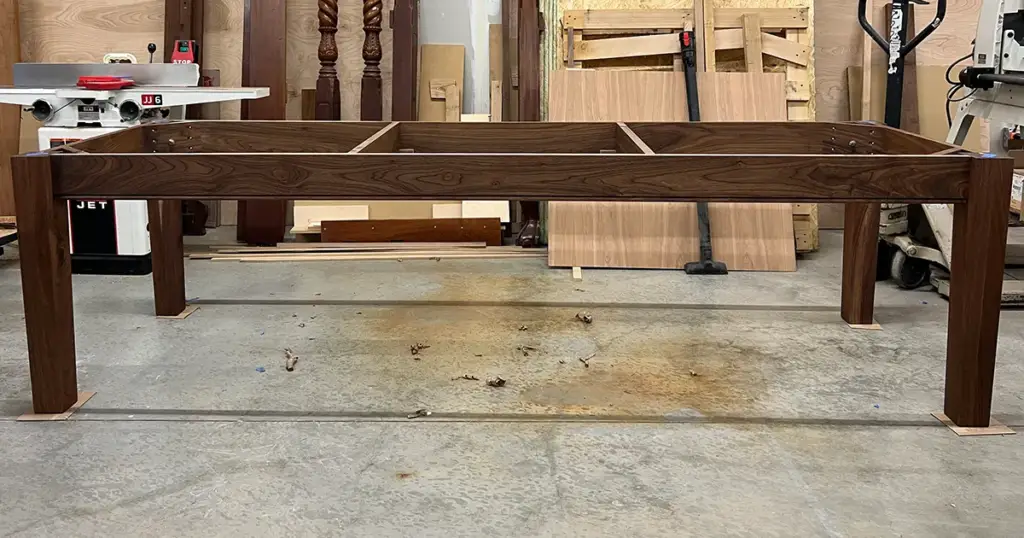
Dining Table for 10: Crafting a Sturdy Base with Timeless Joinery
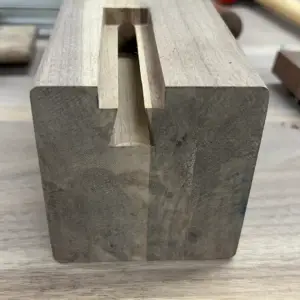
In the heart of the workshop, a symphony of craftsmanship begins as we forge ‘The Weight’s’ sturdy base. The long aprons find their destiny, marrying with the massive walnut legs through time-honored mortise and tenon joinery. The strength and beauty of this classic technique become evident as each tenon finds its perfect fit in its corresponding mortise.
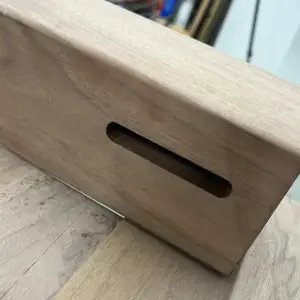
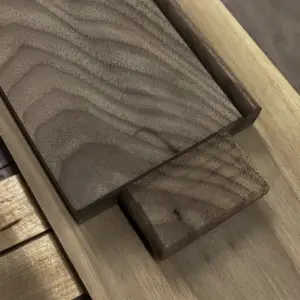
As we continue the dance of precision, we embrace the hidden grace of sliding dovetails for the end aprons. Although unseen in the final product, this joint harmonizes practicality with simplicity. Its unmatched strength ensures secure connections without the need for glue or the complexities of a tenon. They also allow us to ship the table unassembled in a custom made flat(ish) crate.
With the base assembly complete, our journey proceeds. The table’s aprons, now resolute, offer us a stable platform to move onto the next enchanting phase—tapering the two inside edges. This tapering will add a subtle touch of refinement, elevating the base to a refined and sophisticated state.
Through each step, from joinery to elegance, ‘The Weight’ becomes more than a table—it embodies the essence of fine craftsmanship and thoughtful design. Soon, tapered legs will grace the base, and the tabletop will rest elegantly upon it. As we progress, the allure of walnut will blend with the client’s vision, culminating in a timeless masterpiece designed to stand the test of time and be cherished for generations to come.
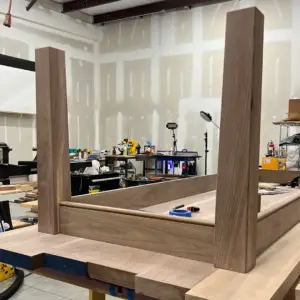
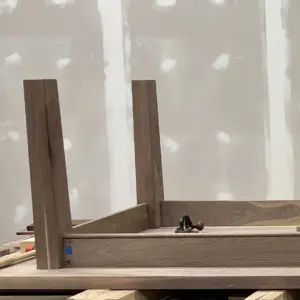
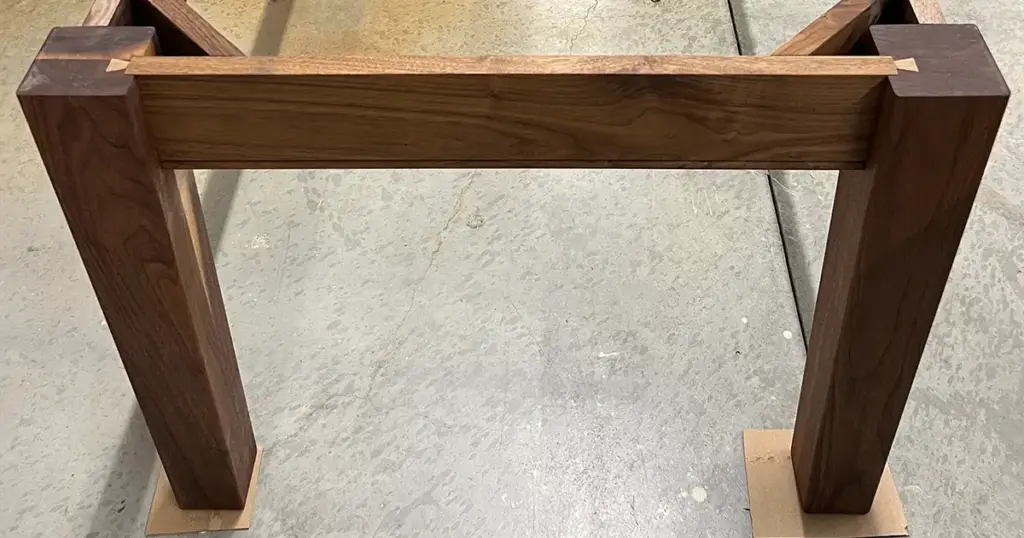
Dining Table for 10: Dry Assembly of Legs and Aprons for the Perfect Foundation
In the quest for perfection, we embark on the critical phase of dry assembly—a meticulous process that ensures every element of ‘The Weight’ aligns flawlessly. With precision and care, we fit the legs into the aprons, savoring the satisfying connection.
In this dry fit, we witness the fruits of our labor as the pieces interlock like a harmonious puzzle, laying the groundwork for the final masterpiece. We check for uniformity, making small adjustments as needed, guided by our commitment to excellence.
Each joint is scrutinized, ensuring they are both snug and seamless. The beading along the aprons reveals its grace, adding a touch of artistry to the sturdy foundation. Step by step, the table’s character shines through, and we know we’re on the path to something extraordinary.
Dry assembly grants us an invaluable opportunity to verify that every element is in its rightful place. This meticulous attention to detail prepares us for the final steps of crafting. We stand back, admiring the raw beauty of ‘The Weight,’ knowing that the bond we’ve formed with each piece is nothing short of remarkable.
Our commitment to excellence drives us to leave no stone unturned. The dry assembly affirms the vision we share with our clients—a table that will become the centerpiece of their home, reflecting both their style and our unwavering craftsmanship.
As the puzzle pieces fall into place, we anticipate the final transformation that awaits. With the assurance that every detail has been meticulously tended to, we stand ready to usher ‘The Weight’ into its final form, a testament to dedication, passion, and skill. The glue-up beckons, and the countdown to reveal this bespoke dining table for 10 begins.
The Home Stretch for our Walnut Table for 10
With the base meticulously assembled, the culmination of precision and craftsmanship takes center stage. Each component is carefully marked, a map to guide the table’s future assembly in its Idaho home. The table’s foundation, strong and true, stands as a testament to our dedication to both form and function.
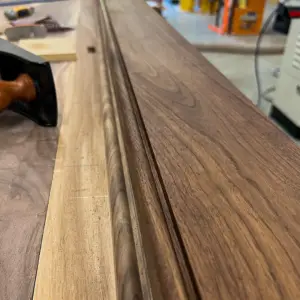
The transformation continues as the tabletop receives its final touches. Trimmed to its exact length, the table emanates a sense of completeness. The meticulous journey through sanding, from 150 to 220 grit, ensures a smooth and refined canvas, ready to embrace the next stage of its transformation.
As we approach the finishing line, the final details emerge. A subtle roundover delicately frames the edges, adding a touch of softness to the table’s strong presence. With precision, we hand sand every inch to a velvety smoothness, inviting touch and admiration.
The anticipation builds, and we’re thrilled to unveil the upcoming progress images, capturing the last leg of this remarkable journey. Stay tuned for the grand finale—an extraordinary dining table for 10, meticulously handcrafted and ready to grace its rightful place, bringing both functional elegance and lasting beauty to its new home.